By David Pitman
Defensive Coordinator
Sachem North High School (NY)
Twitter: @coachdip
I recently wrote a sort of manifesto, putting the defensive system that I have adapted and evolved over the course of my almost 20-year coaching career into words. I want to share part of the introduction to that report:
“I have read many articles promoting the value of playing multiple fronts and although I understand this value, I believe that it also promotes the ‘Jack of all trades, master of none’ mentality. In our system, we talk about playing a singular front with multiple coverage checks and adjustments. Our players are given visual keys and taught that action leads to reaction. If they can master this action and reaction, I believe that we can compete. In high school, we have to coach the players that show up and at times those players will not be the most talented players on the field, but by concentrating on a singular front we create mastery, it is this mastery that defines ‘What We Do.'”
It may help to understand that I began putting my system into a series of formal articles as I accepted a new position as the defensive coordinator at Sachem North High School, the district where I live and where my two boys will play football. I was asked to bring and install the defensive system that had led my previous school to a Long Island Championship.
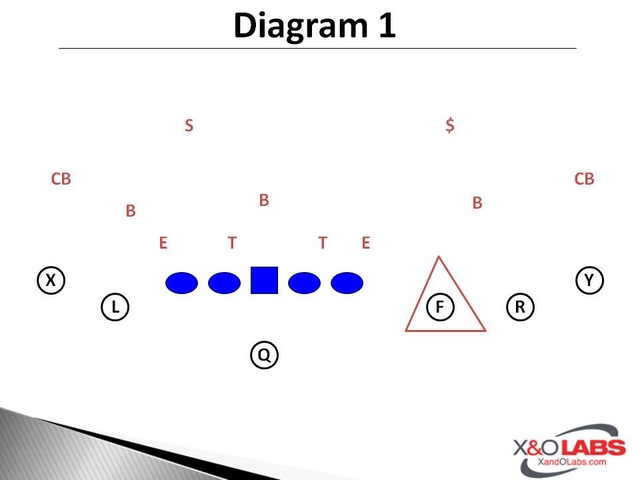
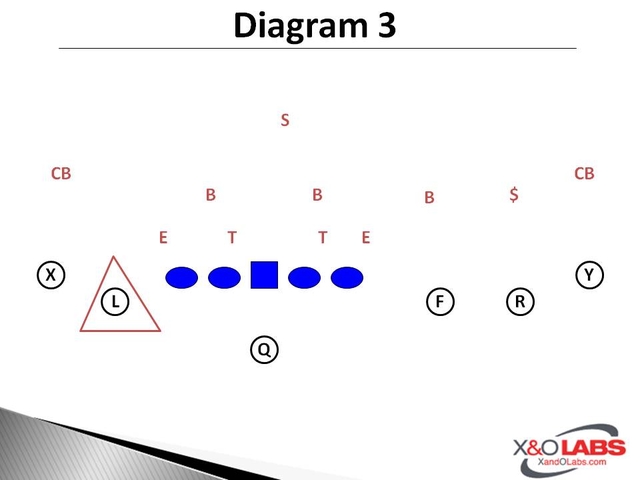
In my original report, I spoke, in a general way, about a 3-4 defense built around a box that rarely changes. We play a 0 and two 4is with two ILBs aligned at 5 yards over the guards almost 100% of the time. By consistently, “Closing the Box” we can through automatic coverage be prepared to play against a multitude of different offenses. We believe that this consistency allows us to be a sound high school defense year in and year out.
The purpose of this report is to detail how we teach the 4i. It is ultimately this technique that is perhaps the most important and yet most overlooked part of any sound 3-4. I recently listened to a podcast on the 3-4. In this podcast the host spent over an hour discussing how the 3-4 is successful because it allows he said it requires you, to move your defensive line on almost every play. He spoke of his slants and stunts and how it created confusion for the offense by changing gap responsibilities. Although I understand and accept this philosophy, I found myself wanting to engage in a debate. I believe the value of the 3-4 is you can simplify gap responsibilities. By mastering the 4i technique you do not have to move or slant. This allows your LBs and DBs to fit into consistent run fits. I am not saying we never move, but over the course of the game, we are in a base call that majority of snaps. I believe that we must be able to defend soundly any offensive challenge that we face in our base defensive call. The key to doing that is the 4i.
4i Personnel Type
The reality of coaching at public schools is you have to have a system that adapts to the strengths and weaknesses of your team on any given year. To be a dominant 4i you do not have to be any size and shape. I have found success with all types of players. I have never had the 6’2″ 250lb DE that many of us envision when we think 3-4 DE. The key to this technique is a selfless, disciplined kid. A player who is willing to trust his visual key and smart enough to react with the proper action. More important than his physical attributes are his ability to recognize and react. Just to prove this point, I am coming off the most dominant defense I have ever coached. Statistically, we were the best defense in Suffolk County and a top-three defense on Long Island. My two kids that played the majority of the 4i snaps were average players at best. However, they played this technique very well. One was a weight room kind of kid, 5’10” 215 and strong but slow and not very athletic. This player worked very hard to master this technique and through his dedication became an All-Division player as a B gap dominator. The other player was a little bigger 6’1″ 230 but not nearly as strong or dedicated in the weight room. He was a bit faster and more athletic but not nearly as strong. He was a returning starter who seemed to get better with experience. He was also an All-Division player. These two did not have dominant statistics but by controlling the B gaps through the 4i technique they allowed us to be a championship-caliber defense and were recognized.
4i Stance, Alignment, and Start
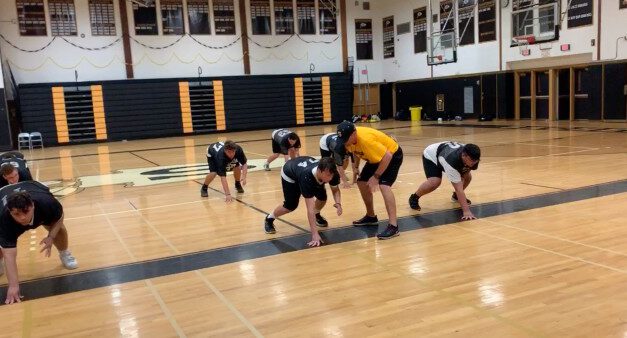
We begin in the winter by teaching all linemen and OLBs the 4i technique. This technique is so important to what we do that it must become a habit for our kids and the more kids that have mastered this technique the more competition we will have during training camp.
We start with feet a touch wider than our shoulders and a slight stager with our right or left foot depending on whether we are in a right- or left-hand stance. We teach both right- and left-hand stances and require that players can play out of both. Once players have their feet set, I ask them to sit on an imaginary stool with their chest out and elbows on their knees. This sets the angle of their ankles and knees and creates the overall position of the stance. I then tell the players to, keeping their ankles and knees locked roll/ fall forward onto both hands. Their hands should be slightly in front of their heads. If they kept their ankles and knees locked, they should have rolled into a powerful, balanced stance with their hips slightly above their shoulders. The last thing is to lift their off-hand off the ground if players are not strong enough to fire out of a three-point stance I have them stay in a four-point stance. My commands for teaching this stance are. “Set your feet, sit on a stool, Roll/Fall forward, Offhand up.”
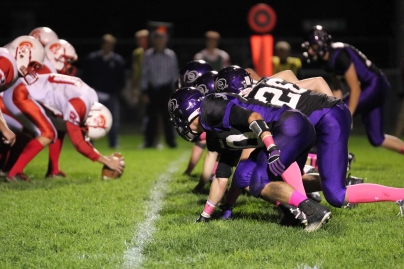
The 4i will align with his down hand on or near the inside foot of the offensive tackle. We tell the 4i that he must be aligned on the frame of the tackle, he cannot be in the gap. Depending on the player his alignment will be slightly different. He must be in a position that the tackle can never scoop him or cross his face but also be in a position that he can touch the tackle on any sort of reach scheme. Ultimately the 4i is a B gap dominator. He will consume the B gap and dominate any blocking scheme in the B gap, including inside and outside zone, power, trap, and option.


306")


 I began coaching 16 years ago at a small high school, and have been calling plays from a No Huddle offense ever since. The largest evolution for me has been streamlining plays in two specific ways: First, the terminology used in a play, from many words to as few as one; and two, taking single stand-alone plays and combining them into a singular play concept. As a staff, we now try to live by a 25-play script rule in our game planning process.
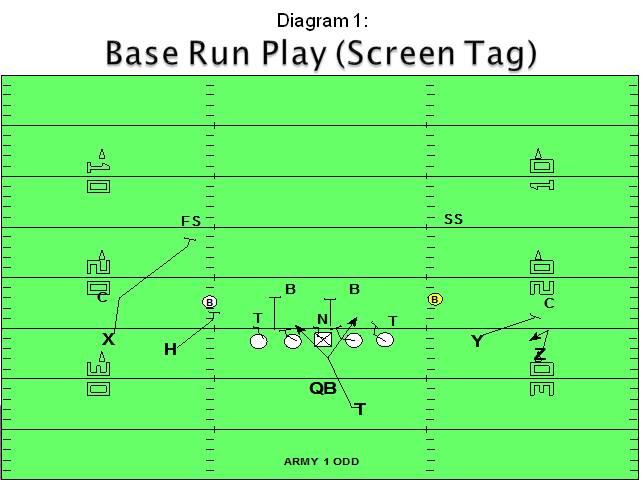
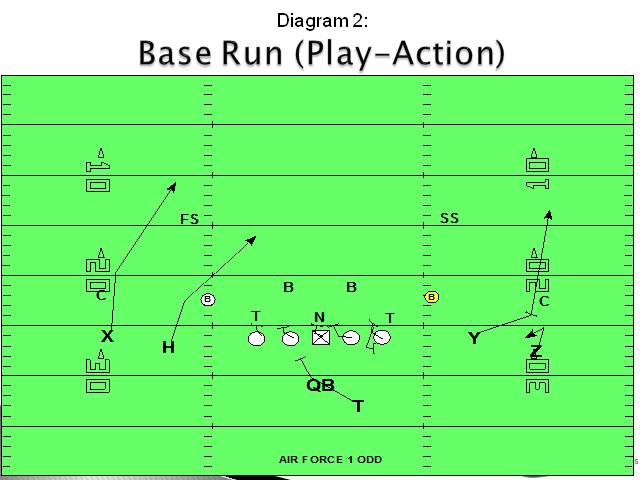 Next, we carry our scripts through three specific play-calling situations:

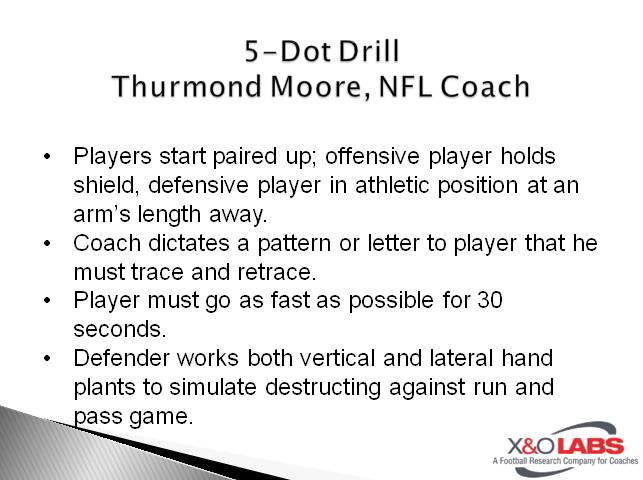

 When conducting our research on RPO concepts, we found that the majority of coaches package their RPO concepts together, meaning they will teach both the run element and pass element at the same time. Then, they will work on developing the QB’s pre-snap read key and post-snap movement key. This comes in the form of constant drill work, which is done on a daily basis. These are the drills below that these coaches are using to train their QB’s eyes to make the correct reads in RPO concepts.
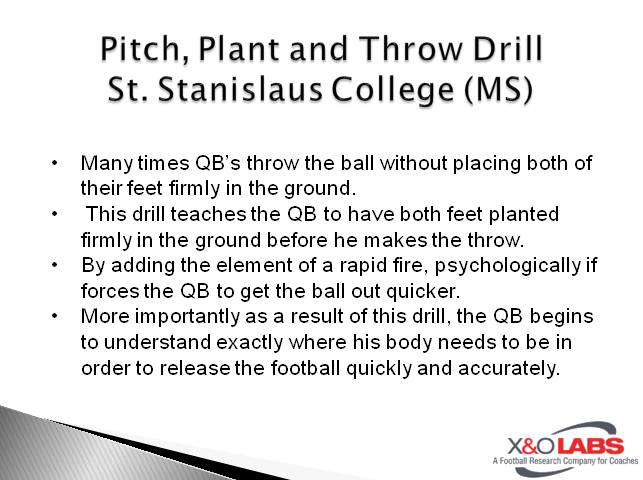
 Last spring, X&O Labs Senior Research Manager Mike Kuchar spent three days with Bud Foster and his defensive staff studying the Hokies Bear Package, which the Hokies used on 54 snaps to hand Ohio State University its only loss last season. While the entire Bear study can be
 Editor’s Note: Known too many as an “Offensive Innovator” Joe Osovet serves as the offensive Coordinator at Nassau Community College in New York. During his time there, his teams have had tremendous offensive success and finishing at the top of the division rankings. Joe pioneered an innovative spread offense in 2012 to lead the NJCAA in most offensive categories. His highly effective offense produced two thousand yard rushers and garnered a top ranked scoring offense which averaged over 41 points per game. Joe Osovet is a much sought after keynote speaker on his spread offense. He is a regularly featured speaker at Glazier and Nike Football clinics across the country. Joe brings charisma, energy and devotion along with his 18 years’ experience to the coaching profession.
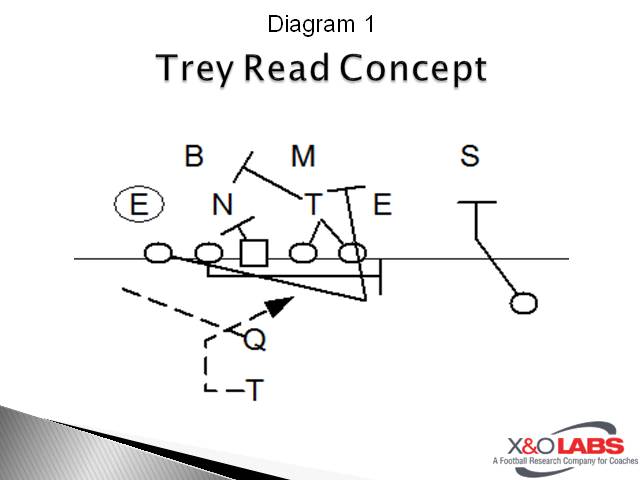
 Editor’s Note: Coach Young has been the head coach at Skyview HS for 11years and has 19 years experience overall. He has coached LBs for 17 of those 19 years. His players have been named All-Conference Defensive MVP, five 1st Team All-Conference LBs, and two 1st Team All-State LBs. The Skyview defense has ranked in the top 5 in the 4A level for each of the past four years. This year, Skyview played in the State Championship game for the first time in its history.
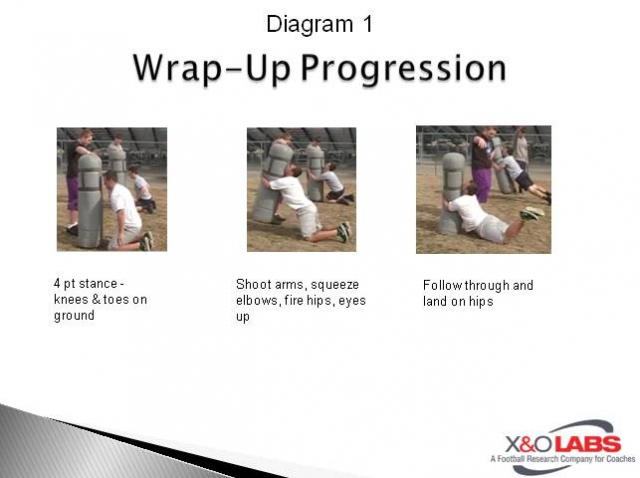
 Editor’s Note: Tom Yashinsky is the head coach at Onalaska High School in Onalaska WI. He has just completed his 2nd year as head coach. He was an offensive assistant on staff for four years prior to being named head coach. He coached at University of Wisconsin La Crosse as a student assistant and at Ben Eielson Jr.-Sr. High in Alaska before moving to Onalaska.
 The Akron Zips are averaging 304 passing yards per game through its first two contests this season and much of that yardage has come from vertical concepts. Receiver coach John Pont details the eight drills he uses daily to teach his inside receivers how to gain separation at the line of scrimmage and stack defenders.