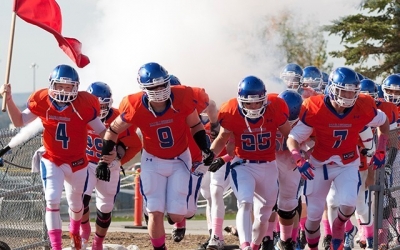
By Lazarus Morgan
Defensive Coordinator
Alfred University (NY)
With Adam Hovorka
X&O Labs Managing Editor
If you do not let the other team score, it is hard to lose the game. Sounds simple enough, right? Our defense wants to be the absolute best at not allowing points. Yards tell lies, so at Alfred University, we strive to be the best scoring defense in our conference every year.
In 2016, we had a great season: a 12-1 record, a run to the elite 8, and we finished number 1 in several defensive categories in the Empire 8 Conference. But, we were awful in the Red Zone. We gave up a TD approximately 70% of the time an offense would get into the red zone against us. Going into the 2017 season, I knew we had to get better in that area.
In 2017, we gave up a TD roughly 43% of the time an offense would get in the red zone; an improvement of nearly 30%. How did we do this? First, we changed the culture in the program regarding how we viewed the red zone. Then schematically, we simplified things so our athletes could play fast when the size of the field had become much smaller.
In changing the culture, the mentality of the defense now became that it did not matter what happened that allowed the offense to get to the Red Zone. We taught our players and trained them to block that out. Now it is all about holding the offense to a field goal attempt, or better yet, getting the ball back.
When an offense had a short field, in the past we would see some kids have that “here we go again mentality” that carried a very negative vibe and led to finger pointing. We changed that mentality, encouraging our players to be very excited because it was now an opportunity to show how great we are as a defense. And they loved embracing that challenge.
This past season during a typical game preparation week, we practiced red zone defense three times a week. In this report, I will focus on how we play defense in the red zone from the 20 to 10 and the 10 to goal line, since for us those are two different defensive areas.
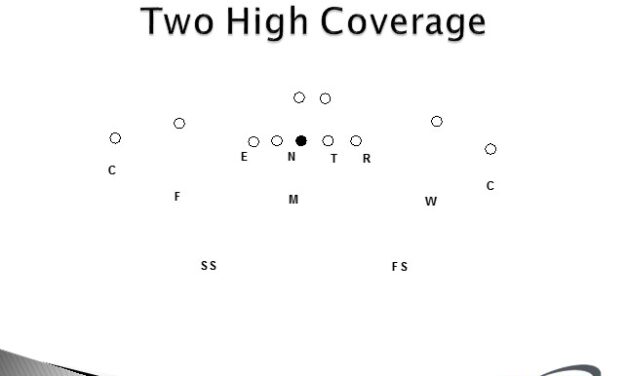
In the red zone, we do three things: we play a two-high coverage, a one-high coverage, and have a pressure package.
Two-High Coverage
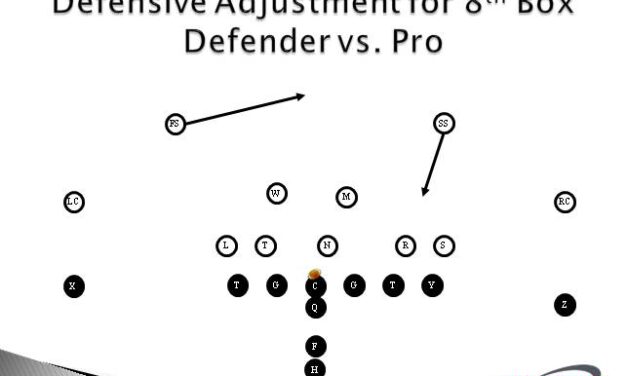
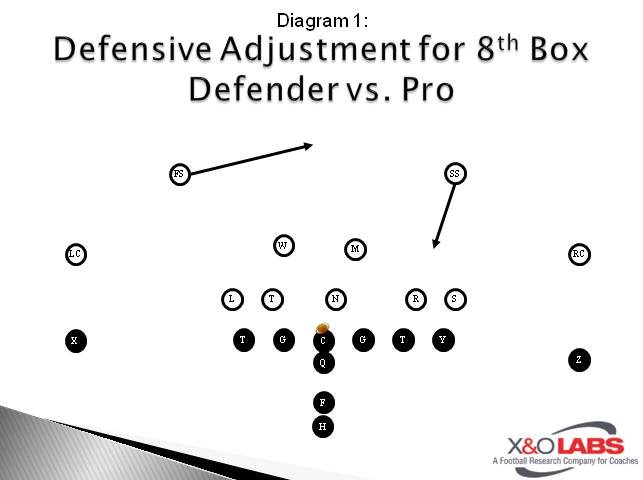
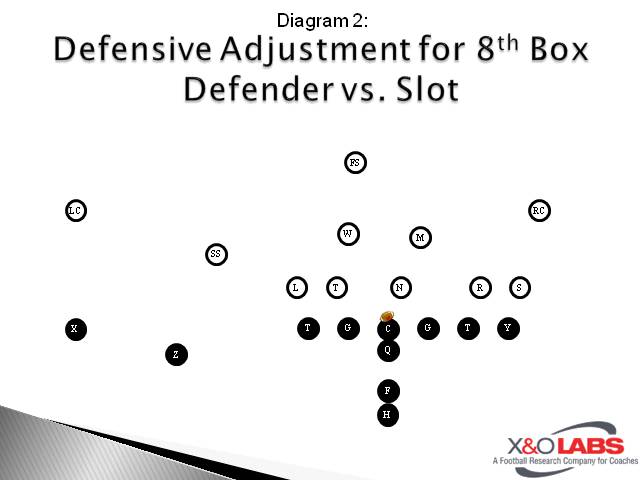
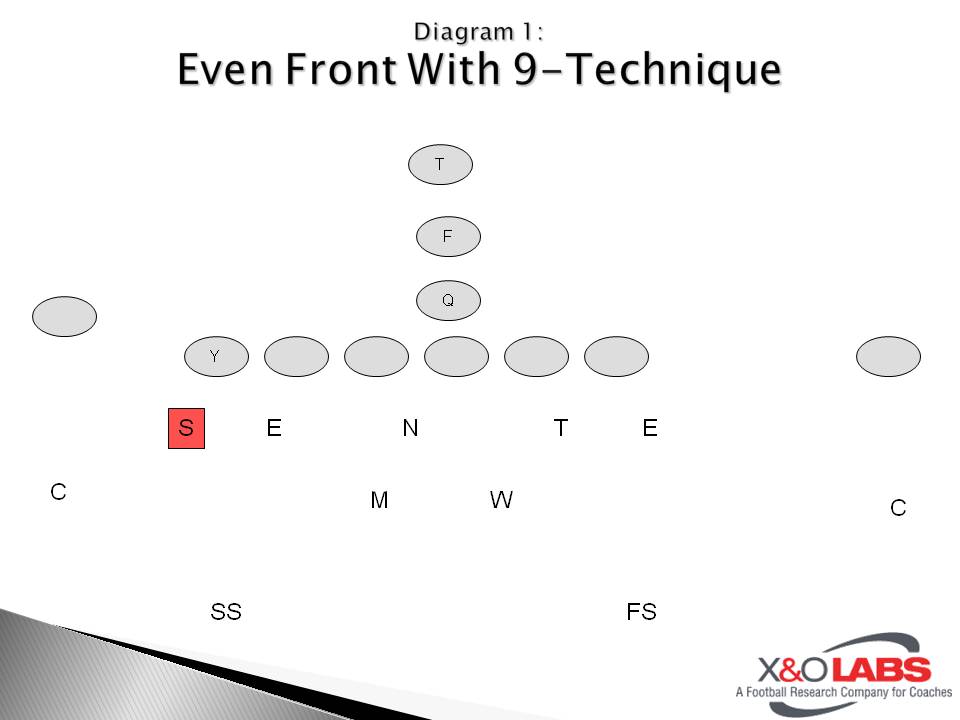
Everything we do for the most part as a defense in terms of coverage is from a two-high shell. Our two-high coverage is good for any type of 2×2 formation, or a pro or twins set. It allows us to commit nine players to the run game and gives us four defenders to play four verticals by the offense. Let’s start with the run first. Our coverages and our run fits are married together. In our defense, if you are the widest defender, you are a “force/fold” player, while all other players that are a part of the box are “fast” players.
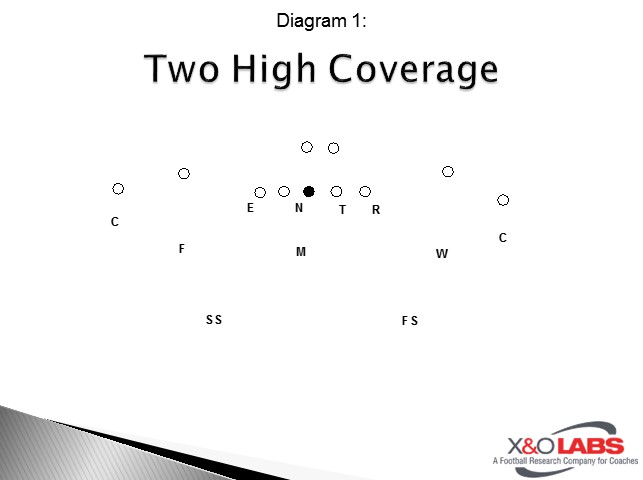
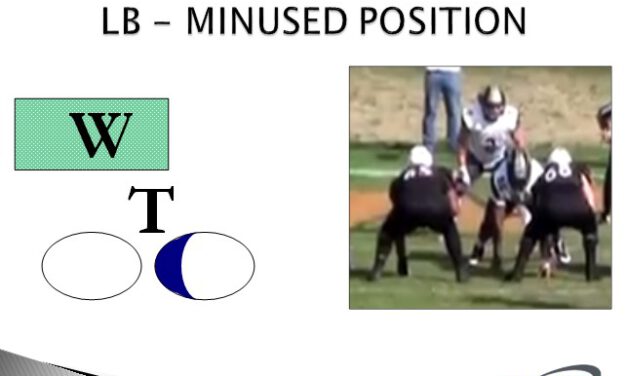
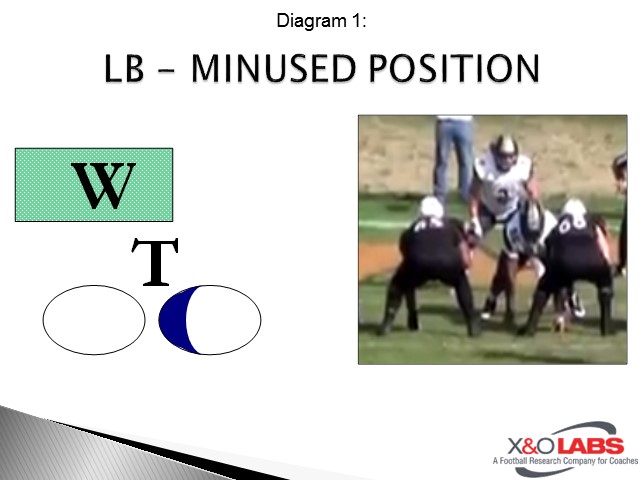
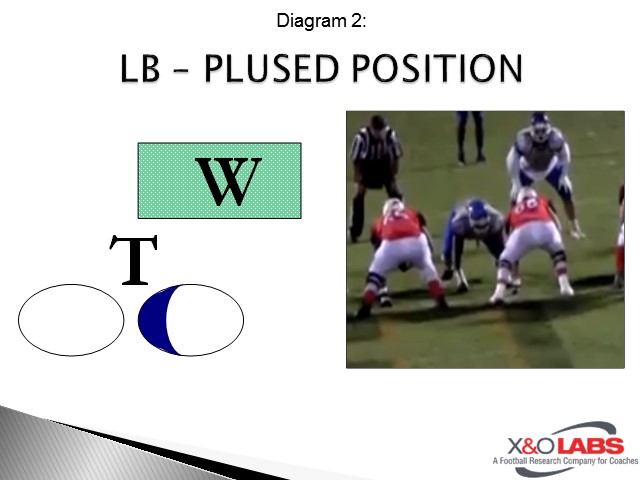
In the diagram above, the force/fold players would be our Frank and our Will LBs. Their alignments will be predicated on the split of the WR in relation to the hash, the Frank LB will never get wider than the hash and the Will LB will never end up wider than the number 2 receiver if the ball is on hash. In our defense, “Force” simply means the ball coming to you, make the tackle. If you do not make the tackle, you must turn the ball back inside. We are a big leverage tackling team, so that tackle should be made with the players inside foot and inside shoulder forward. If the ball goes away, we want those players to take two shuffles with their shoulders square looking for the cutback. If the ball is not cutting back after they have taken their second shuffle, they pursue to the football.
Our fast players in the diagram are our Mike LB and our Safeties. Fast players in our defense take an inside out path to the football. We want those players to be on the inside hip of the ball carrier. The Mike can be aligned anywhere between a strong side 30 to a weak side 10 based on the tendencies of the team we are playing that week. The safeties align approximately 12 yards deep, 1-2 yards inside the number 2 receiver. If the number 2 receiver is a TE, then that safety will tighten to about 10 yards. Both safeties are keying the #2 receiver to their sides for a run pass/read. If they read pass, based on the defensive call, they could be covering the number 2 receiver man-to-man on any vertical climbing route or they could be playing a true quarters coverage. Our corners start in a press alignment. They will utilize a press-bail technique if we are playing true quarters coverage. When they press-bail, on the snap they will flip their hips open allowing them to read the QB as they drop straight back to their deep outside quarter. If they are pressing and playing man, they will not bail, as they have that number 1 receiver man-to-man, protecting the inside and forcing an outside release.


306")


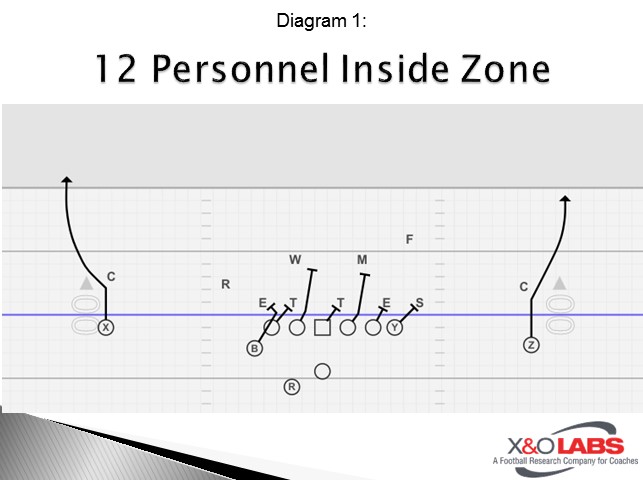
 Ralph Isernia, Head Coach, Rensselaer Polytechnic Institute: “From the shotgun, the QB will ‘jump’ the snap and step with his back side foot opposite of the read. He will clear the midline by stepping up and over, away from the read. The step is 2 feet toward the LOS and 2 feet off the midline. Basically, his toes will be on the center’s back side foot. After the first ‘Clear’ step, he will come to balance with his back side foot. With his eyes on the read, he will get his shoulders back and extend the ball back to the FB. The FB will take a drop step with his BS foot for timing and run the midline course 100 mph. With inside arm up, he will soft fold over the ball and feel for ‘push-pressure’ from the QB give. His eyes are on his action key (the block in A gap) so he can read the block.”
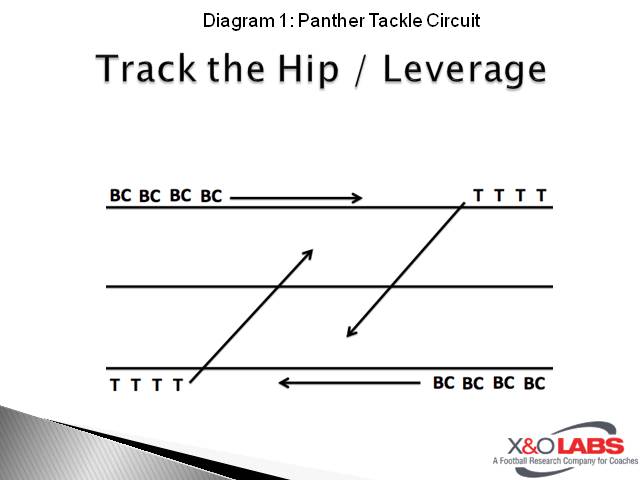
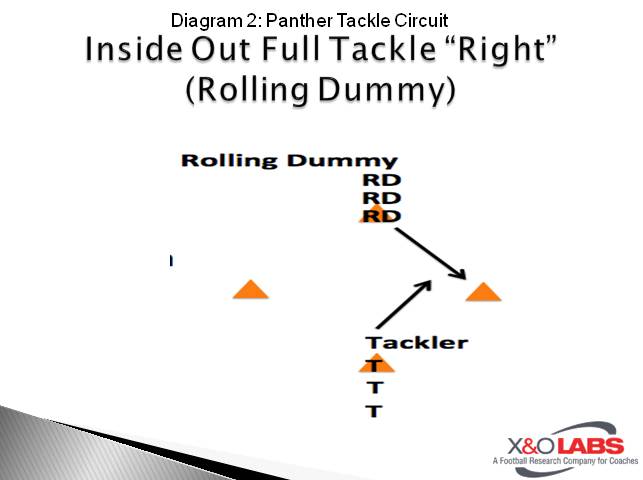
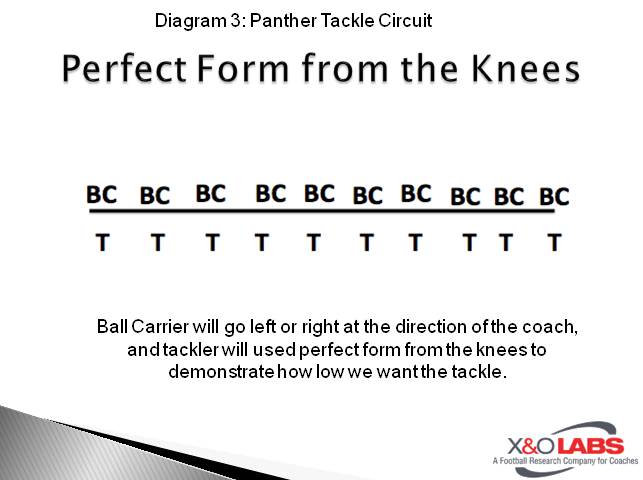
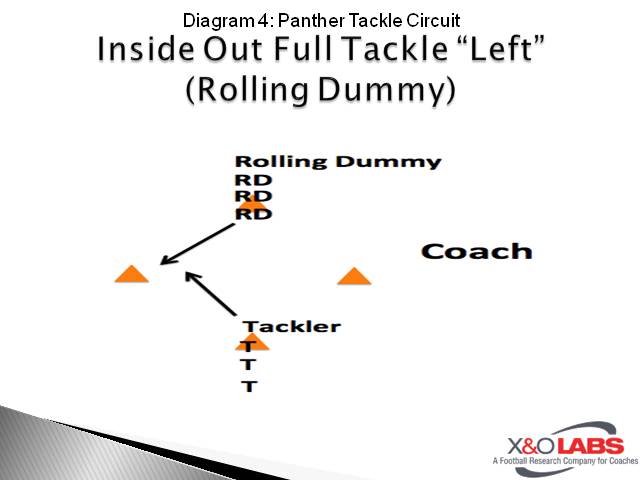
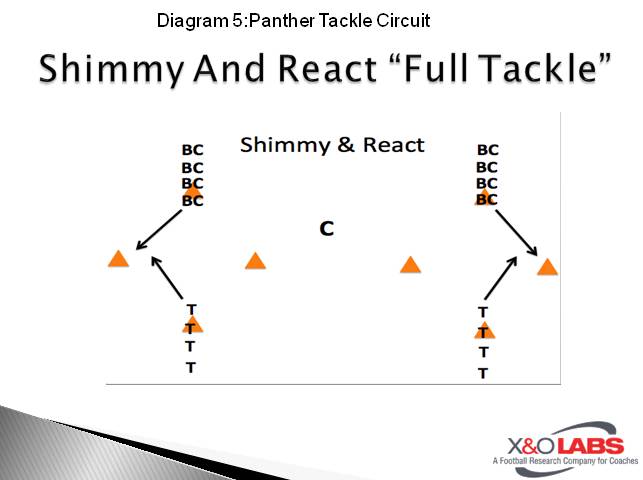
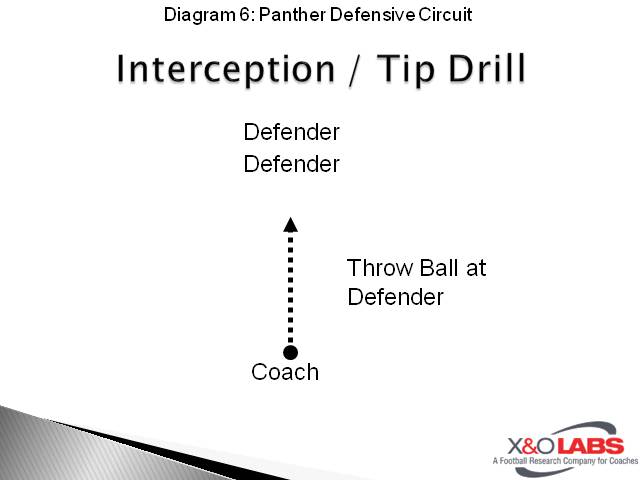
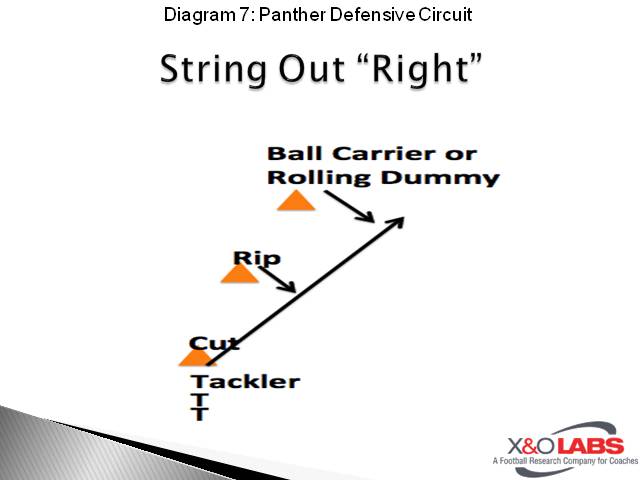
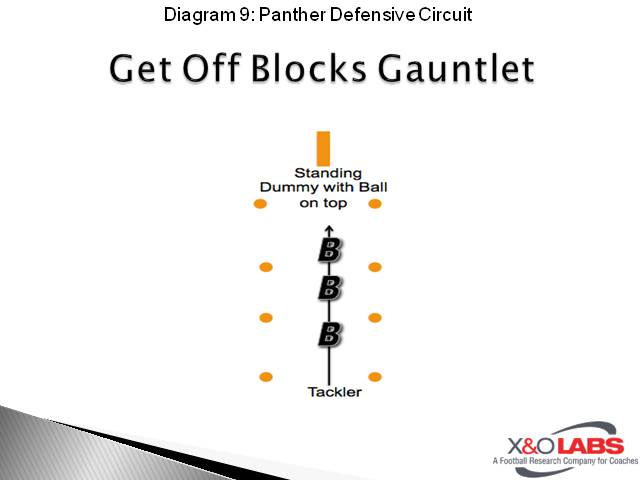
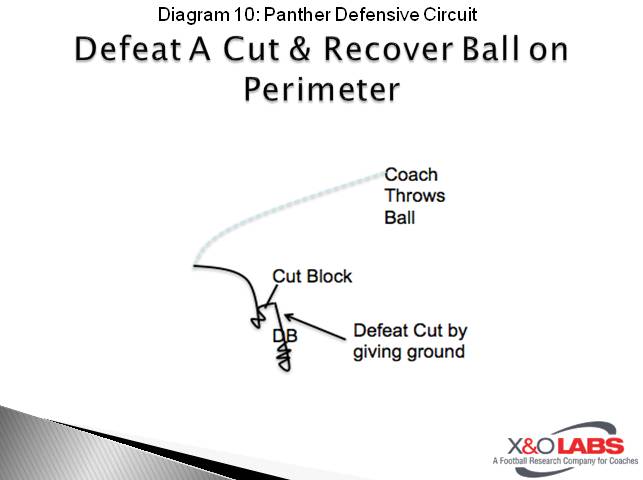
 All great defensive coaches teach effort. But how to teach effort continually needs to be addressed. Maxims like “run to the ball,” or “get there quicker” are being quickly replaced with refined coaching points on how to take the correct angles in running to the ball carrier. These are several of the more efficient drills that we pulled from our drill film library that teach defenders the proper pursuit angles when closing in on a ball carrier.
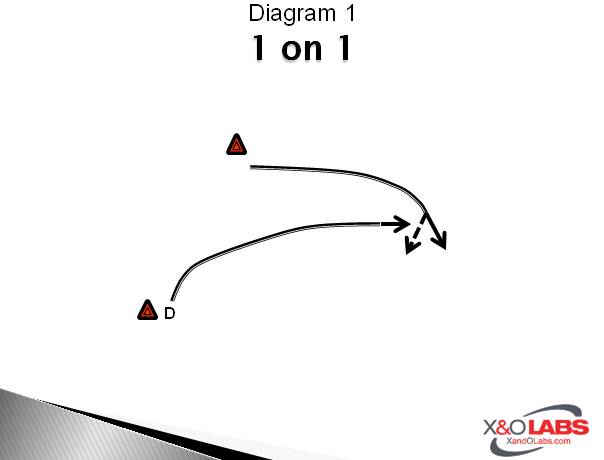


